Here’s an easy way to control the tonality in your images using a technique called “Self Blending.”
One technique to darken or lighten an image is to jump the layer and change the [termlink tax=’tutorials’ term=’blend-mode’]blend mode[/termlink] of the new layer to “Screen” (to lighten it) or “Multiply” (to darken it). You could then add a layer mask and start painting on the mask to hide or show the areas that you want to make lighter or darker. While this is a quick and easy way to work, there’s another technique you could use that would achieve the same results, but keep your file size down and increase the number of adjustment options available to you—in other words, it’s a better way to work. The technique I’m referring to is called “Self Blending.”
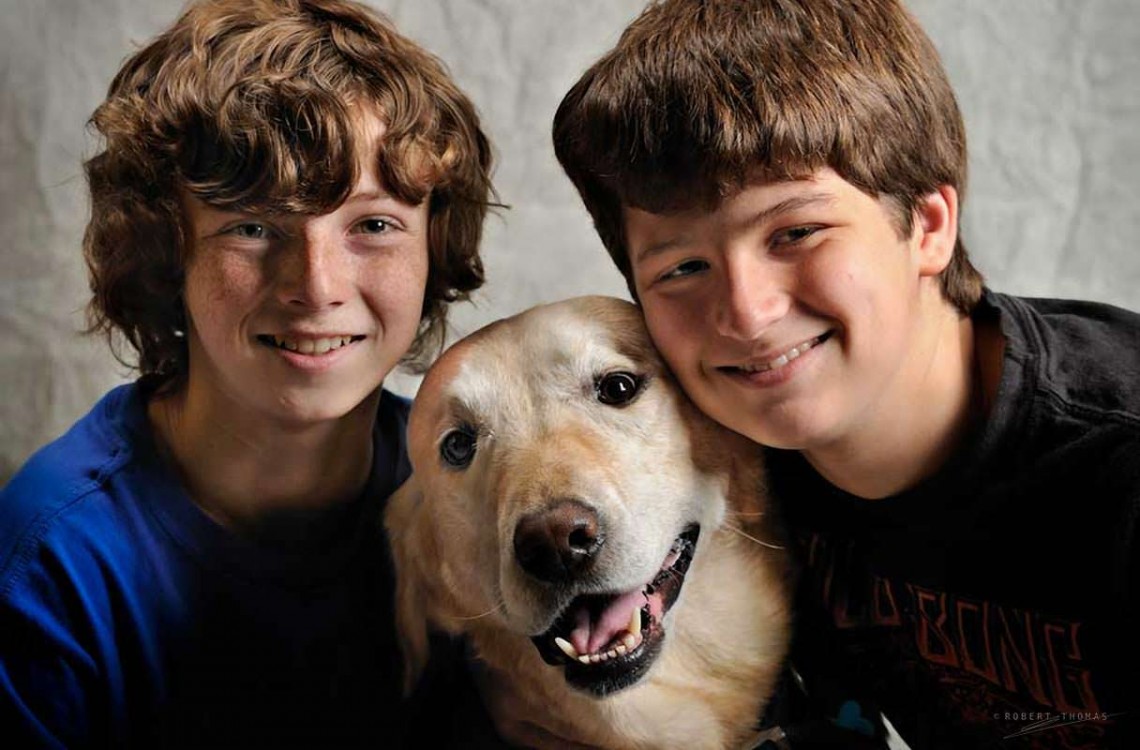
In this tutorial I’ll be using the image shown below. Feel free to use this image, or use one of your own to follow along.

Watch the Video:
The steps
Brighten some of the darker areas in the image
Open the image in Photoshop and set the Image Mode to 16 bis by selecting Image | Mode | 16 Bits / Channel. Setting your image to 16 bits is optional, but I always work in 16 bit mode to minimize information loss.
In the Layers panel, click on the “Create new fill or adjustment layer” icon, and select “Curves…” to add a new Curves adjustment layer.

Change the blend mode
Next change the blend mode for this new layer to “Screen” by using the keyboard shortcut Shift+Option+S (PC: Shift+Alt+S), or select “Screen” from the menu in the Layers pallet.
If Shift+Option+S isn’t changing the blend mode they way it should, be sure you have one of the selection tools selected before using the shortcut. For example, hit “M” key to grab the Marquee tool, and then use Shift+Option+S. For additional information on using blend mode keyboard shortcuts, please see my article “Photoshop Blend Modes Explained.”

Self Blending
By applying a blend mode to the Curves adjustment layer, you’re basically creating a “placebo” or “dummy” layer, and the blend mode acts as if you are using the image on itself. In other words, the dummy layer is taking on the characteristics of the entire image, and the blend mode you select gets applied to itself (which is the entire image composition). This is the beauty of “self blending”—you can achieve this effect without having to duplicate the entire image (jumping the background layer), and as a result, keep your file size down.
Note that you don’t have to use a Curves adjustment layer to take advantage of self blending—you can use any of the options found in the “Create a new fill or adjustment layer” menu that you can “leave alone” and not make any adjustments to, provided the option doesn’t change the image. For example, the Exposure, Levels, Brightness/Contrast and Vibrance options would work fine as self blending layers because you can add them without having to change any of the adjustments, and they don’t change the image. Conversely, the Pattern or Gradient tools wouldn’t work as self blending layers because they would change the image.
Once you change the blend mode to “Screen,” you’ll notice that the entire image gets brighter. We want to selectively paint in our effect, so invert the white layer mask by using Cmd+i (PC: Ctrl+i).
If this keyboard shortcut doesn’t work for you, the layer mask probably isn’t selected—click once on the layer mask to select it and try inverting it again.
Once the layer mask is inverted, it will turn black, and the “Screen” blend mode effect will be completely hidden.
When working with Layer masks “Blacks Conceal and Whites Reveal.”
- If you want to hide the effects of a layer, and selectively paint in the effect, fill the layer mask with Black and paint with White.
- If you want to reveal the effects of a layer, and selectively paint out the effect, fill the layer mask with White and paint with Black.
To selectively paint in the brightening effect, select the Brush tool by hitting the “B” key, or select it from the Tools panel as shown below. Then hit “D” to load the default color pallets—this will set the foreground to color to white, and the background color to black.

Begin painting (with white) with a soft brush over the areas you think need to be brighter. If you’re following along with me using the supplied image, I painted over the shadows on both boys faces using moderate “Opacity” and “Flow” brush settings (50% for each).
If you make a mistake when painting, you can just hit “D” again to reverse the color pallets, and paint with black instead of white—this will paint the brightening effect back out again. Once you’ve corrected the mistake, hit “D” again to swap your pallet colors and continue to paint the brightening effect in.
Brush tool keyboard shortcuts
- Brush Size: Use the “[” or “]” keys, or if you’re using CS4 or above on a Mac, you can hold Ctrl+Option while pressing the left mouse button and drag your mouse left or right (my favorite technique). If you’re using a PC, you can hold down the Alt key and press the right mouse button while you drag the mouse left or right.
- Brush Hardness: Use “Shift+ [” or “Shift+]”, or if your using CS4 or above on a Mac, you can use the same keyboard shortcut for the brush size (Ctrl+Option), and drag your mouse up or down. If you’re using a PC, you can hold down the Shift+Alt keys, and press the right mouse button while you drag the mouse left of right.
- Brush Opacity: Press a number between 0 and 9. For example, if you press the 1 key, you will set the brush opacity to 10%. If you press the 5 key, you will set the opacity to 50%, and if you press the 0 key, you will set the brush opacity to 100%.
- Brush Flow: Press Shift+a number between 0 and 9. For example, if you press Shift+1, you will set the brush flow to 10%. If you press Shift+5, you will set the flow to 50%, and if you press Shift+0, you will set the brush flow to 100%.
Once you’ve painted the brightening effect in, you’ll want to apply a feather to your brush strokes to soften them. To do this, click on the “Masks” tab up in the Curves window. Then drag the “Feather” slider to the right to apply a mild feather (3px to 7px) to your brush strokes.


You may or may not see the impact of applying the feather to the brush strokes, but you can “show your mask” by Option+Clicking on the layer mask thumbnail (PC: Alt+Click). To hide the mask, Option+Click on it again.

For those of you that are the curious types (like me), you can also disable the Layer mask to see what the image would look like without it. To disable the Layer mask, Shift+Click on the layer mask thumbnail (you’ll see a big red “X” on top of the Layer mask). To re-enable the mask, just Shift+Click on it again.

Because we used the self blending technique on a Curves layer, and we didn’t take the “jump the layer” route, we now have the option of using any of the tools in the Curves dialog box, and as I mentioned earlier, the resulting file will also be smaller in size (especially if you’re working with PSD files).
Darken some of the areas in the image that are too bright
To darken some of the bright areas in the image, simply repeat the above procedure, but this time change the blend mode for the Curves layer to “Multiply” instead of “Screen.” After inverting the layer mask you would then be painting in a darkening effect.
Use the following steps to paint in a darkening effect:
- Create a new Curves layer
- Change the blend mode to “Multiply” (Shift+Option+M) (PC: Shift+Alt+M)
- Invert the mask to hide the effect (Cmd+i) (PC: Ctrl+i)
- Paint with a white brush to apply the darkening effect
- Feather your brush strokes
- Modify layer Opacity as needed
Other Tips
- If you like the effect of a given layer, but want a stronger effect, you can “jump” the layer by selecting it and using the keyboard shortcut Cmd+J (PC: Ctrl+J). Note that this won’t significantly increase the file size because you’re jumping a Curves layer, and not the background layer. You can then adjust the Opacity back down if the effect is too strong.
- Keep in mind that you have the option of using any of the other tools found in the Curves dialog box, as well as directly modifying the curve for any of the Curves adjustment layers on a composite RBG level, or individually for any of the 3 RGB color channels.
- You can also place all of your adjustment layers into a new Group, and then adjust the Opacity of the Group (which will in turn change the Opacity of all of the layers collectively). To place your layers in a Group, Shift+Click on each layer you want to place in the Group, and then hit Cmd+G (PC: Ctrl+G).
- You can also place a layer mask directly on the Group layer, and paint the effect in or out as needed.
Once you’re done adjusting the tones in the image, you may have several Curves adjustment layers. From the image below, you can see that I have jumped both the brightening and darkening layers (you can tell because the masks are the same), and I added a 5th Curves layer that is set to the Normal blend mode. On this layer I painted the perimeter of the image to darken it a bit, so the viewers eye is drawn towards the subjects. I also manually adjusted the curve to darken the border.

The before image
The after image

That wraps-up this tutorial on using self blending techniques to correct the tones in your image!
Please feel free to leave a comment or ask a question!
For an in-depth explanation about [termlink tax=’tutorials’ term=’blend-mode’]blend modes[/termlink] and the math used, read my article “Photoshop Blend Modes Explained.”
[poet-badge]
Thank you for this incredibly detailed and useful tutorial. You have a gift for teaching.
Thank you for the comment and the compliment!
You saved my life Robert. This is very detailed tutorial. Thank you so so so much. I added you in my bookmark 🙂
Glad to hear you found the tutorial useful Oğuz!
Thank you so much for this good idea. it will be more helpful for developing an image with photoshop. thanks
Robert –
I’m new to photography. I love this information. Thank you so much for taking the time to write this. I’ve been trying to understand Photoshop for a while and it’s not a simple software. Again, thank you so much for taking the time to write this and create the video!