In this tutorial you’ll learn how to add a mirror-like reflection to the bottom of your images. This is an easy to apply effect that can add some extra dimensionality and character to your images.
Watch the video
The steps
Duplicate the Background layer
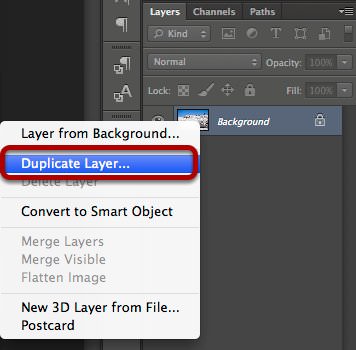
Duplicate (jump) the Background layer by right-clicking on the layer thumbnail and selecting “Duplicate Layer.” Another way to jump a layer is to select the layer and use the keyboard combination Cmd+J (PC: Ctrl+J).
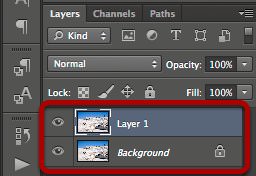
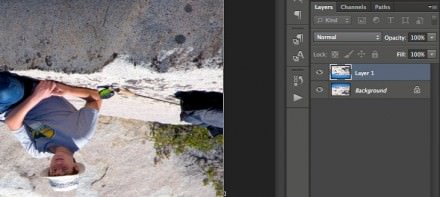
Once the layer is jumped you’ll see two layers in the Layers panel.
Flip the image
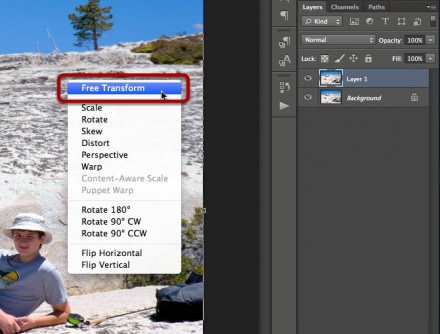
With the new layer selected, right-click on the image and select “Free Transform.” You could also use the keyboard shortcut Cmd+T (PC: Ctrl+T).
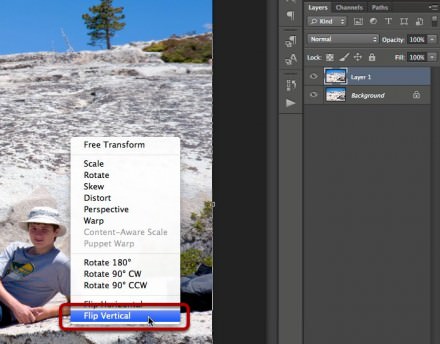
Right-click on the image and select “Flip Vertical.” Press the Return key to accept the change.
Zoom out to make room for the mirror effect
Zoom out to give yourself room to add the mirror effect. Press and release the “Z” key, and hold down on the Option key (PC: Alt) while clicking on the image. Zoom out to the point where your image fills about half of your Photoshop window.
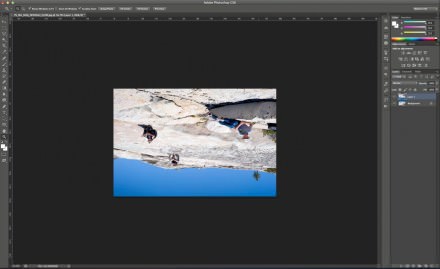
Increase the canvas size to accommodate the mirrored effect
Increase the canvas size by about 30% to make room for the mirror effect. Use the keyboard combination Cmd+Option+C (PC: Ctrl+Alt+C) to open the Canvas Size dialog box. Select “Percent” and enter 30. Select the “Relative” check box, and click in the top middle box in the grid—this tells Photoshop to extend the canvas downward. Set the “Canvas extension color” to black.
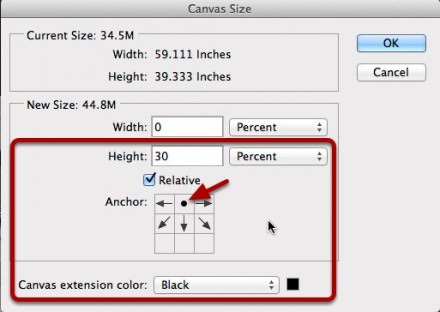
Select “OK” to accept your changes. You should see the canvas has extended downward, and the canvas color should be black.
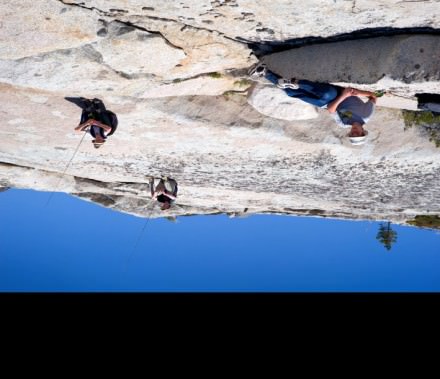
Move the flipped layer downward
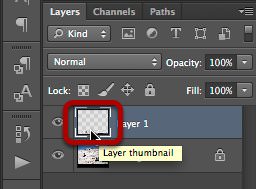
Confirm the flipped layer is active by clicking once on it in the layers pallet. A white border will appear around the image’s thumbnail when it’s selected.
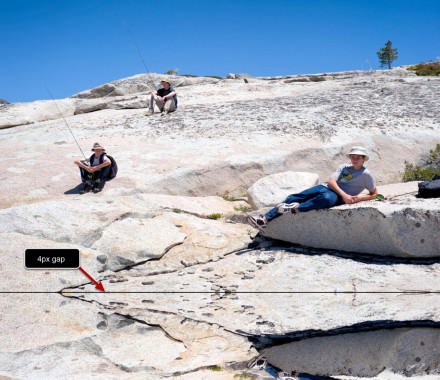
To move the flipped layer downward press the “V” key once to select the “Move” tool. Click and hold on the image while you drag downward. Drag the image downward to the point where the flipped image is below the normal image, but leave a small gap (apx. 4px) between the two images—as you’ll see later, this will give us a thin line between the image and the mirror effect.
Add a layer mask
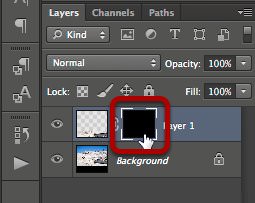
Add a black layer mask to the layer you just moved downward. With the layer still selected, Option+Click (PC: Alt+Click) on the “Add layer mask” icon.
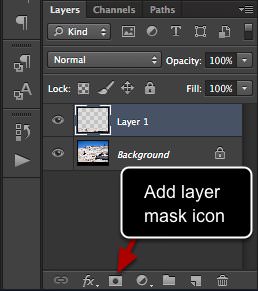
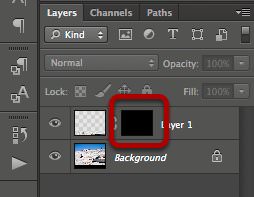
A black layer mask will be added to the layer.
Add a linear gradient to the mask
Select the layer mask by clicking on it once—a white border will appear around the mask thumbnail.
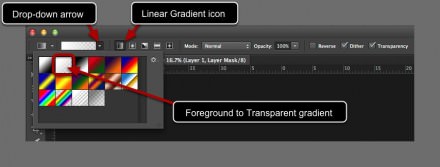
Add a “Foreground to Transparent” linear gradient to the layer mask. Press the “G” key to select the Gradient tool, and click the “Linear Gradient” icon to select a linear gradient. If the current gradient isn’t already set to “Foreground to Transparent,” click the drop-down arrow in the gradient selection window and select it. Also confirm the Mode, Opacity, Reverse, Dither, and Transparency options match those shown in the illustration.
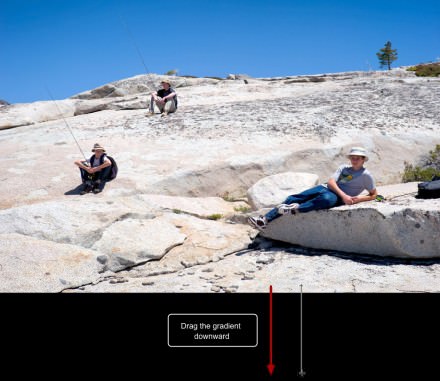
Create the gradient by dragging downward from an area a little above the black canvas to a location a little before the bottom of the end of the black canvas. Try to make both the starting and ending points of the gradient equidistant in relation to the black canvas. It may take a few tries before you get the gradient you’re looking for. If the gradient doesn’t look right use Cmd+Z (PC: Ctrl+Z) to undo your changes and try again, this time changing the starting and ending points for the gradient. I also find it helpful to hold the Shift key while you drag out your gradient. This will constrain your dragging motion to a confined angle.
Apply a Gaussian Blur
Select the flipped layer’s image thumbnail (not the mask).
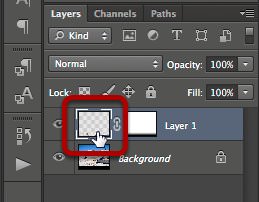
Press the Shift+F7 key, or select Filter > Blur > Gaussian Blur.
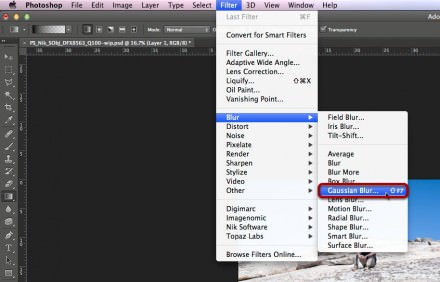
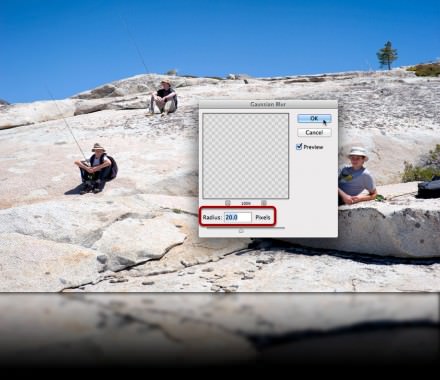
Set the radius to 20px, and click on OK to apply the Gaussian Blur.
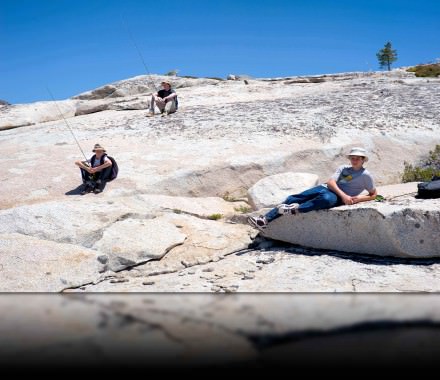
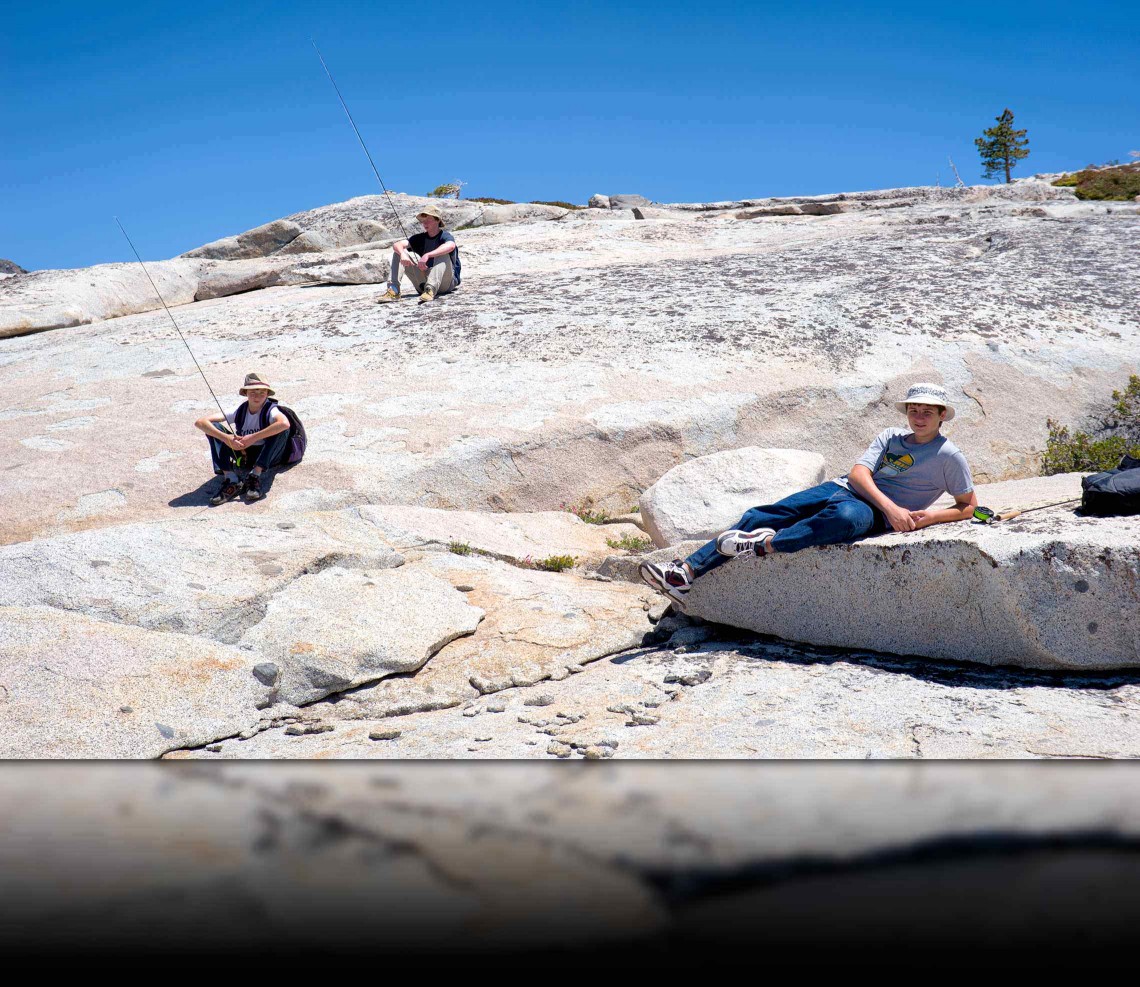
The final image with the reflection effect
[poet-badge]
Thanks so much for sharing such a super class tips. I really appreciate your wonderful explanation. It’s a good learning for me. I will certainly dig it and personally suggest to my friends. I’m sure they’ll be benefited from this website.
Your steps were nice, but it was a bit scary to see the final film because the bottom part of your picture is making a mark. Again the mirror effect became blurred. I was trying to use a mirror effect under the product photo as a test….easily made some senses on the mirror effect. Thanks!