In this tutorial I’ll be showing you how to create a decorative frame around your images using a vector mask. This technique can be especially handy because you can use the same decorative frame on several different images with just a few clicks of the mouse.
This technique can be accomplished using either a standard layer mask (pixel-based) or a vector mask (paths and points-based). I’ll be using a vector mask in this tutorial because it offers additional flexibility, such as the ability modify the mask’s size and shape without degrading the quality of the mask.
Watch the Video
The steps
Quick steps for advanced Photoshop users
- Convert the image to a Smart Object
- Use a Shape Layer tool to draw the shape of the frame
- Place the image at the top of the layer stack (above the vector mask layer)
- Create a Clipping Mask, clipping the image layer to the vector layer
- Add new layer to bottom of the layer stack and fill with a pattern, or place a background image for the frame at the bottom of the layer stack
- Apply a Feather to the vector mask (optional)
- To reuse the frame on a new image, Right-Click on the Smart Object layer and select “Replace Contents”
Step 1
Open your image in Photoshop and convert it to a Smart Object by Right-Clicking on the Layer name and selecting “Convert to Smart Object.”
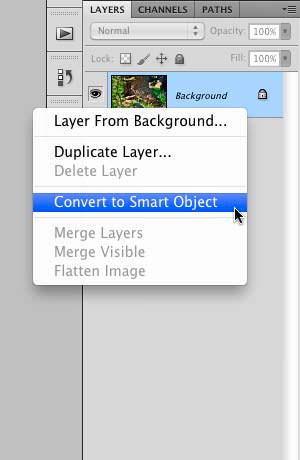
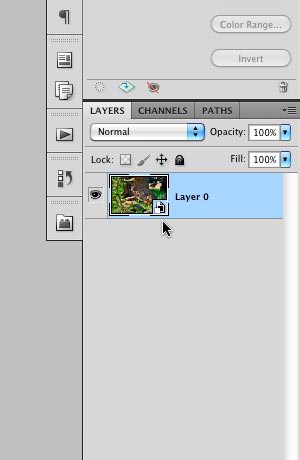
Once the layer has been converted into a Smart Object, you’ll see a small icon embedded in the layer’s thumbnail that indicates the object is a Smart Object.
Step 2
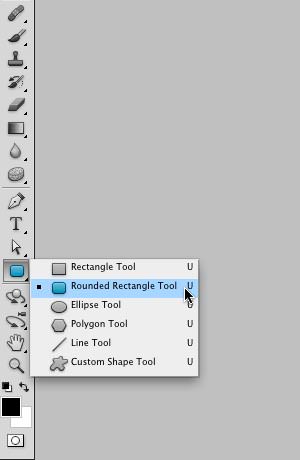
Create a vector mask by selecting the layer shape tool of your choice from the Shape Tools section of the Tools Panel. For this tutorial, I’ll select the Rounded Rectangle Tool.
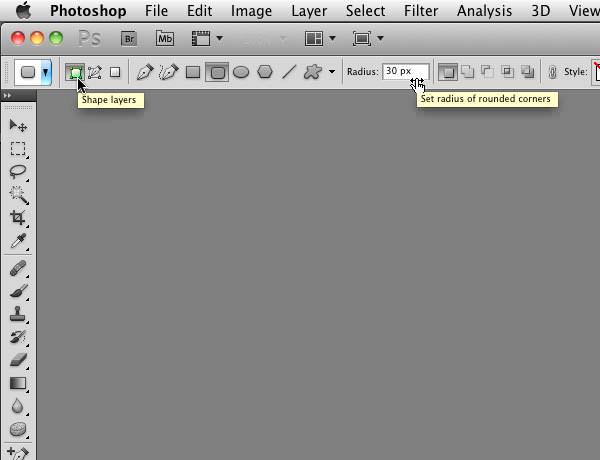
Once the tool is selected, confirm the correct options are set up in the Options Bar—confirm the Shape Layers icon is active, and set the radius to suit your needs (the higher the number, the rounder the corners are). For the image used in this tutorial, I set the radius to 30 pixels.
With the Rounded Rectangle Tool, draw a rectangle over your image as shown below—don’t worry that the mask is covering up your image, we’ll fix that in a future step.
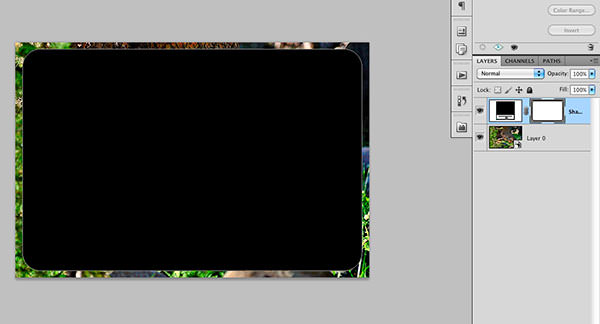
You can hold the space bar down while you drag-out your rectangle to reposition the rectangle on the screen.
Step 3
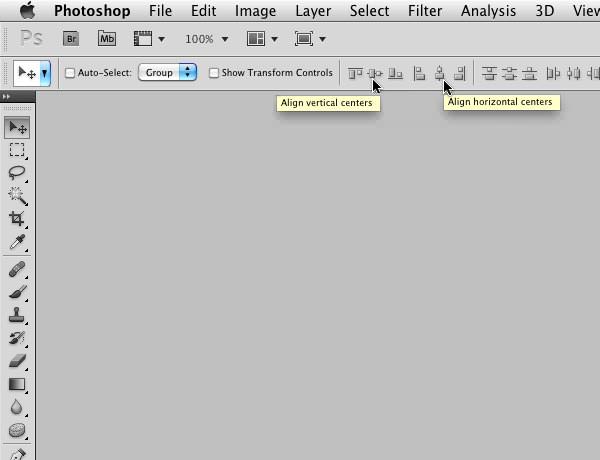
Center the Vector mask in your image. Use Cmd+A (PC: Ctrl+A) to “select all,” and then select the Move tool by hitting the “V” key. When you have the Move tool selected, you’ll see the alignment options at the top of the Options Bar.
Click on the “Align vertical centers” icon to vertically center the mask, and then click on the “Align horizontal center” icon to center the mask horizontally. Once everything is centered, deselect your selection by using Cmd+D (PC: Ctrl+D).
Step 4
Reverse the order of the layers—the layer mask layer needs to be below the Smart Object layer. You can move the layer mask layer to the bottom of the layer stack by either clicking and dragging the layer below the smart object layer, or you can select the layer mask layer, and then use the keyboard shortcut Shift+Cmd+[ (PC: Shift+Ctrl+[).
Step 5
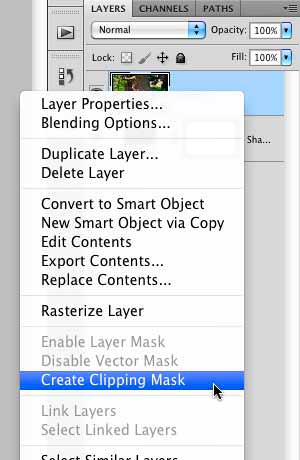
Add a Clipping mask to “clip” the upper layer to the layer below it. Right-Click on (or near) the upper layer’s name and select the option “Create Clipping Mask” (as a shortcut, I prefer to Option-Click between the two layers when the double-circle appears).
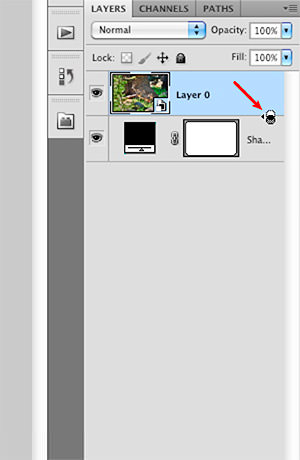
We’re now ready to create our frame for the image! There’s lots of ways to create a decorative photo frame in Photoshop. In this tutorial I’ll show you two techniques—the first uses a Photoshop pattern, and the second uses a separate image.
Step 6a
Framing Option 1—Using a Photoshop Pattern for the frame:
Add a new layer to the bottom of the layer stack—click once on the bottom layer to select it, then Cmd+Click on the “Add a new Layer” icon (this shortcut will add a new layer directly below the currently selected layer, placing the new layer at the bottom of the layer stack).
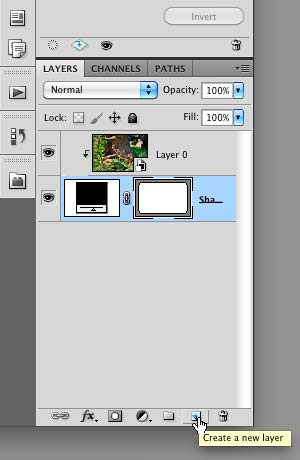
Fill the bottom layer with a pattern by opening the Fill dialog box and select the pattern you want to use. To open the Fill dialog box, use the keyboard shortcut Shift+Delete (PC: Shift+Backspace), or select File > Fill from the upper menu.
In the Fill dialog box, select “Pattern” in the “Contents” section.
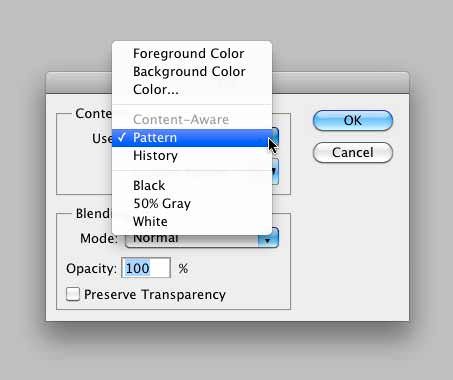
Click on the icon to the left of “Custom Pattern” to select a pattern to use. To view additional Photoshop patterns, click on the small arrow, and then select a group of patterns to load, e.g., Artist Surfaces, Nature Patterns, etc.
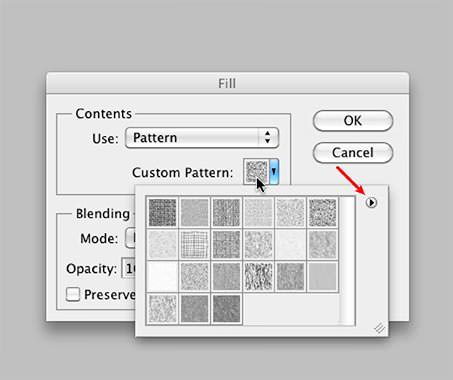
If you selected an additional group of patterns, a confirmation window appear. You can select either “Append” or “OK”—I typically choose “OK,” which will temporarily replace the existing patterns.
Click on “OK” in the Fill dialog box once you’ve selected the pattern you want to use.
If you don’t like the pattern you selected, you can use Shift+Cmd (PC: Shift+Ctrl) to reopen the Fill dialog box, and experiment with another pattern.
Once the bottom layer is filled with a pattern, apply a Feather to the Vector mask. To do this, click once on the vector mask to select it, and then click on the Masks tab. Drag the Feather slider to the right until you get the effect you’re looking for. For this image, I set the Feather to 20 pixels.
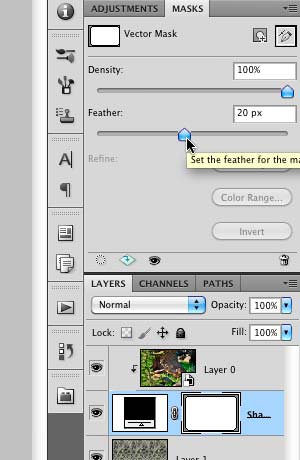
If you see the thin Rounded Rectangle line in your image, just click once in the layer stack on any area other than the Vector mask.
That’s it! You’ve just added a decorative frame to your image using a Vector mask!
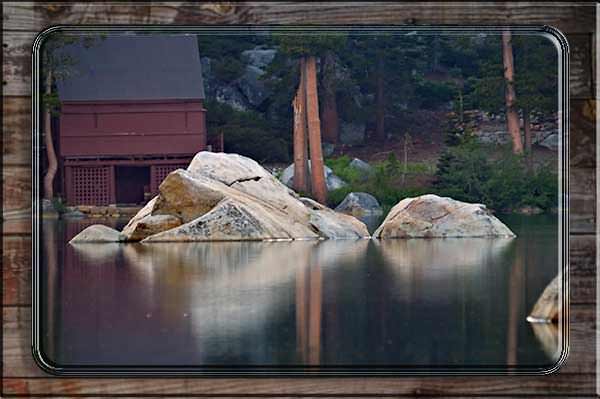
Photo frame with Photoshop pattern.
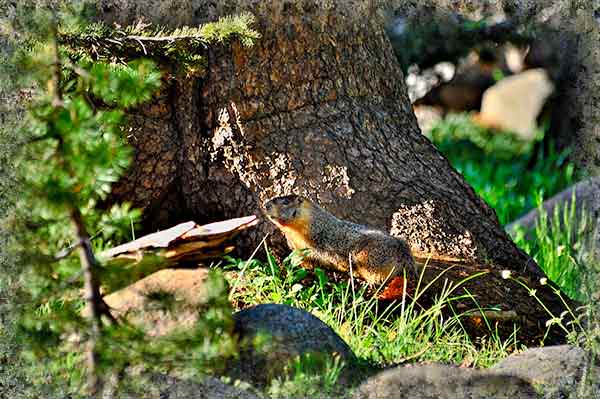
Remember that you can reuse this frame on other images too. Just save the image as a Photoshop PSD file and use it as a template for your other images.
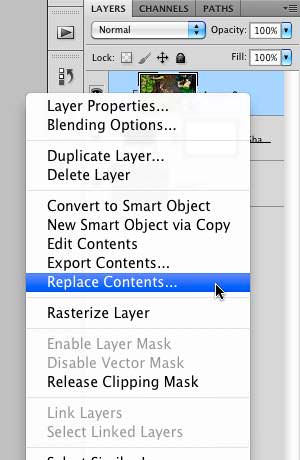
To use this photo frame template on a different image, Right-Click on (or near) the Smart Object layer name and select the “Replace Contents” option. Select the new image you want to use in the picture frame and click on “Place.” Note that this works best if the replacement image is the same (or close to the same) size as the original image.
A different image using the same photo frame.
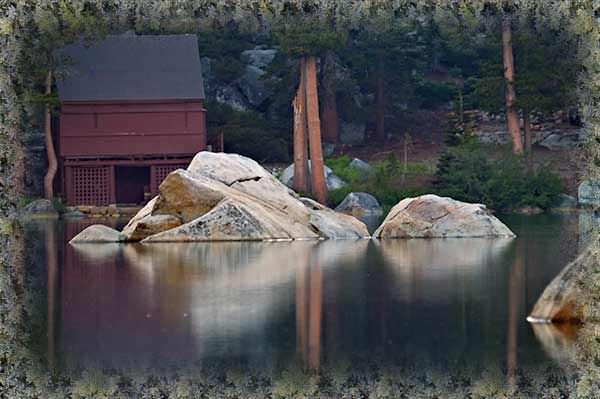
You can change the size and shape of the Vector mask without degrading the quality of the mask—use the Free Transform tool (Cmd+T) (PC: Ctrl+T), or edit the anchor points of the shape’s path using either the Path or Direct Selection tools (otherwise known as the White or Black Arrow tools), or the Pen tools.
Step 6b
Framing Option 2—Using an Image for the frame
Select a background image that you would like to use for the decorative frame. If nothing comes to mind, check out deviantART’s website, it’s a great resource for finding free stock images, textures, etc (try to select an image that is close to the same size as the image you’re working on).
Once you’ve found an image to use, open it in Photoshop. Right-Click on (or near) the background layer name and select the “Duplicate Layer” option.
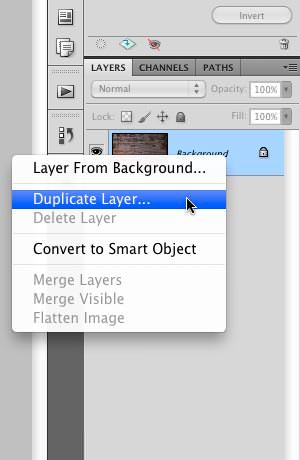
In the Duplicate Layer dialog box, click in the “Document” window and select the file that you’ve been using in this tutorial (the one you want to add the frame to). Click on “OK” to copy the background image.
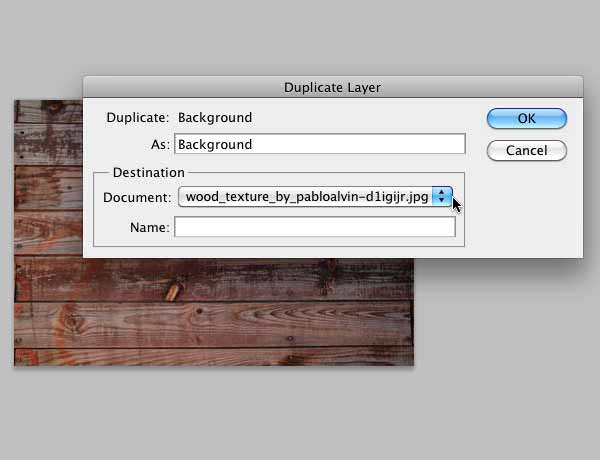
Switch back to your original document and you should see the image you just copied in a new layer. If this new layer isn’t at the bottom of the layer stack, move it there by clicking and dragging the layer.
If the image you selected for the frame is smaller than the image you’re working on, you’ll need to re-size it so it extends all the way to the edges of your document (the canvas). To do so, turn off layer visibility for all layers except this new layer, by Option+Clicking (PC: Alt+Click) on the layer visibility icon for the new layer. Then use Cmd+T (PC: Ctrl+T) to select the Free Transform tool, and hold Shift+Option (PC: Shift+Alt) while you drag one of the corner handles of the Free Transform box until the image clearly extends to the edge of your image (you’ll want to stretch the image so it’s just a bit larger than the canvas size, and the checker-board pattern is totally obscured). Hit the “Return” key (PC: Enter) to accept your changes. Now turn on visibility for all layers by Option+Clicking on the layer visibility icon for the new layer once again.
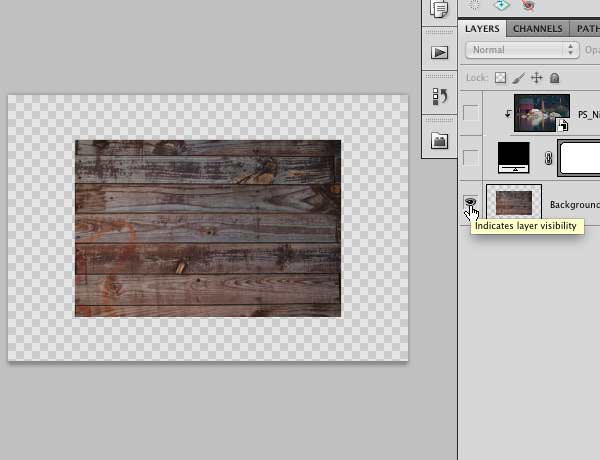
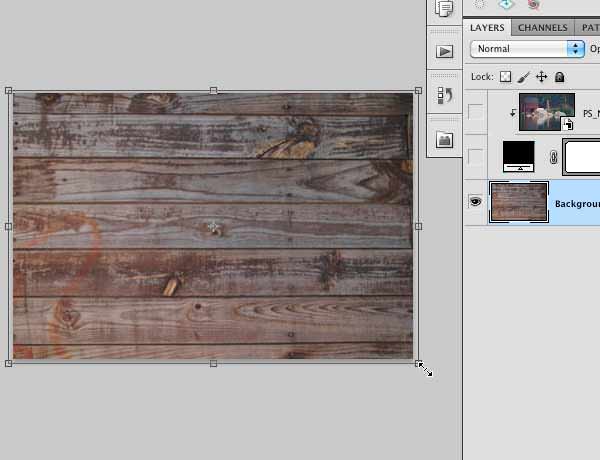
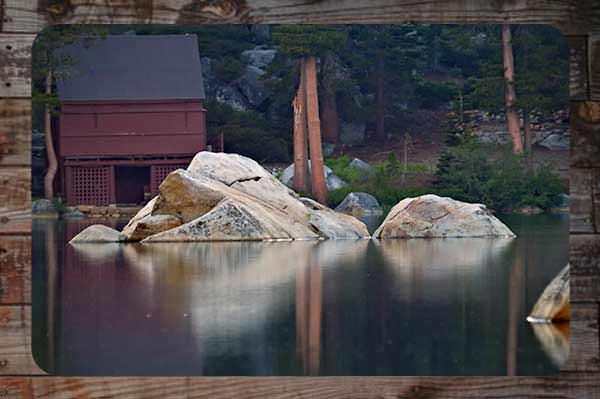
Once the bottom layer is filled with your background image, you may want to apply a Feather to the Vector mask. To do this, click once on the vector mask to select it, and then click on the Masks tab. Drag the Feather slider to the right until you get the effect you’re looking for. For the image shown below, I thought it looked best without applying Feather—it’s entirely up to you!
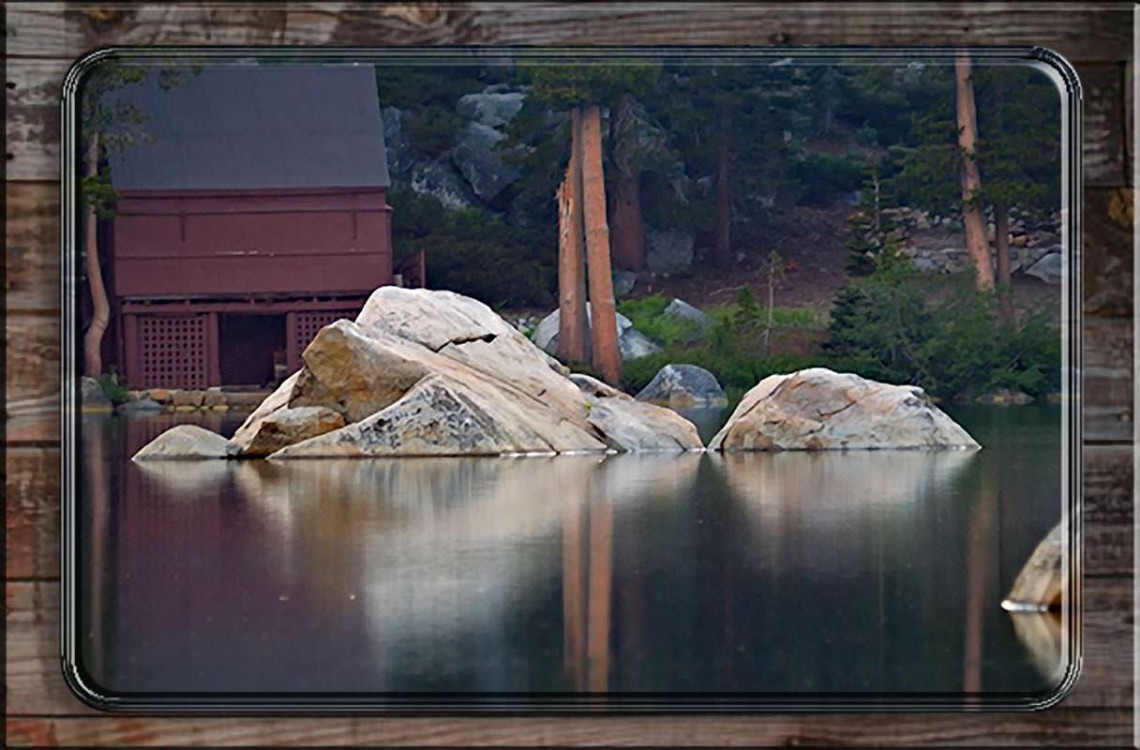
Final Photo Frame
Bonus Tips
- Try adding a Bevel and Emboss to the background image, and a Drop Shadow and Bevel and Emboss to the vector mask layer. Experiment with layer effects and have some fun!
- If you’re looking for a software product that adds frames to your images, check out onOne Software’s Perfect Photo Suite 8. It’s full of useful features and has tons of built-in frames and effects.
Final image with layer effects
[poet-badge]
Thanks a lot for sharing it.
I relaly wish there were more articles like this on the web.
Would this work if the frame was oddly shaped as well? Creating a set of frame templates and some frames aren’t conventional rectangles or just rounded edges.
Yes! This technique will work with a variety of shapes. For example you can apply this technique using the Rectangle Tool, Rounded Rectangle Tool, Ellipse Tool, Polygon Tool, and the Custom Shape Tool.
You can have a lot of fun with the Custom Shape Tool. For example try applying the heart shape to an image of a couple of close friends.
You can even use the Pen Tool to draw your own custom shape. Regardless of which tool you use, be sure to have “Shape” selected in the top menu bar (as opposed to “Path”).
Thanks for the comment!
Nice Information. Well used Making and patterns.