Nik Software’s Silver Efex Pro 2 plug-in is “King of the Hill” when it comes to processing black and white images. The tool offers loads of flexibility and and high quality results with minimal loss of image information (just like all of the Nik Software tools).
In this tutorial I’ll demonstrate the use of this wonderful tool on a noisy, relatively low quality image that I captured back in 2002 using a Nikon 995 digital camera.
I’ll also be using some other tools from the Nik Software collection such as Color Efex Pro 3.0, Viveza 2, and Dfine 2.0.
When enhancing images, it’s good to think back and remember what aspects of the scene caught your eye. Ask yourself “What features were present in this scene that made me want to capture this image…what was the attraction?” Whatever the inspiration was, this is one of the things that you should focus on when enhancing your image—try to emphasize it and share it with the viewer.
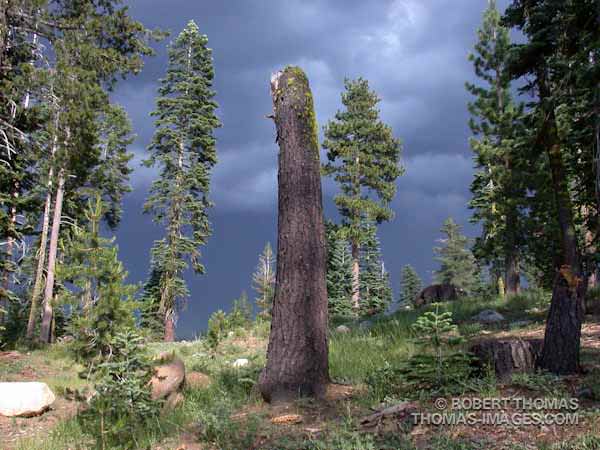
In the image below, I recall that there was an intense storm moving in, and dark clouds were quickly encroaching. Where I stood, there was a lone tree stump glistening in the sunlight, and the stark contrast between the stump and the dark looming clouds in the background caught my eye. My goal for this image was to emphasize this contrast between the light and dark areas, and to revive the mood of the scene by presenting a sense of “storminess.”
The original image
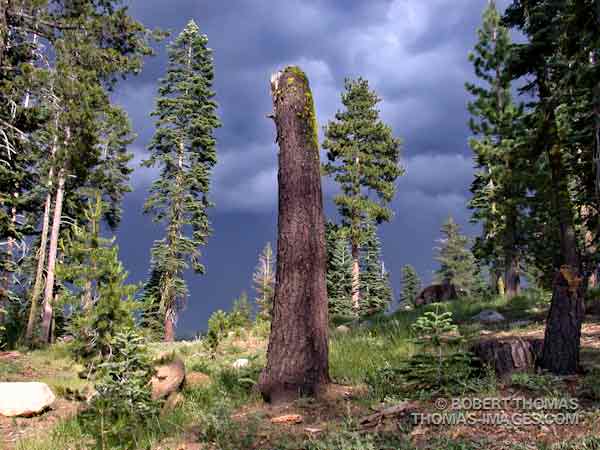
After converting the image into a Smart Object in Photoshop, and adjusting the contrast of the image using Color Efex Pro’s “Tonal Contrast” filter, I warmed up the image and adjusted the saturation using the “Brilliance/Warmth” tool (not really necessary because the image will eventually be converted to Black and White). My next step was to use Viveza to bring out some depth to the sky by adding some structure to the clouds. However, because increasing structure can result in increased noise, and because the sky in this image was already noisy, I felt this was a good time to apply a dose of noise reduction.
A lot of people make applying noise reduction their first step in the image enhancement process, however others (myself included) prefer to apply noise reduction closer to the end of post processing. This is because some of the image enhancement tools can make noise more pronounced. There’s no stead-fast rule that says you must always apply your noise reduction as the first step—it’s up to you, and with experience you’ll get a feel for when it’s the right time to apply noise reduction.
“Tonal Contrast,” “Brilliance/Warmth,” and “Structure” added to the sky
Open the image in Silver Efex Pro 2
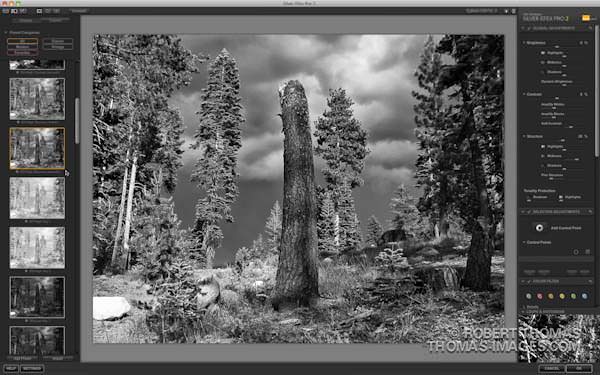
The next step was to open the image in Silver Efex Pro 2. As a starting point I selected the “High Structure (smooth)” preset.
Selecting the “High Structure (smooth)” preset
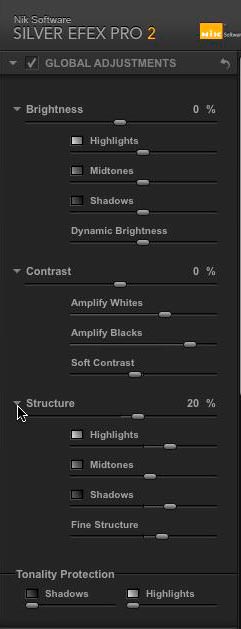
Version 2 of Silver Efex Pro has many new features over its predecessor, one of which is the new “Amplify Whites” and “Amplify Blacks” sliders, which intelligently control these tonal values without the need for placing Control Points. The following is a quotation by Nik Software:
The new Amplify Whites and Amplify Blacks sliders can be used to control contrast in new and unique ways. By moving both of these sliders to the right, the unique algorithms within Silver Efex Pro attempt to bring out the whites and blacks of each object found throughout the image. This is different than normal contrast as instead of making every dark tone darker and every light tone lighter, the shadows and highlights unique to each area are identified and then amplified until they reach white or black.
For this image, I raised the white slider to 67%, and the black slider to 87% to globally make these adjustments. To bring out more texture in the image overall, I also adjusted the structure sliders: raising the Highlights and Shadows to 42%, and the Fine Structure to 30%.
The “Global Adjustments” panel with the new Amplify Whites & Blacks options
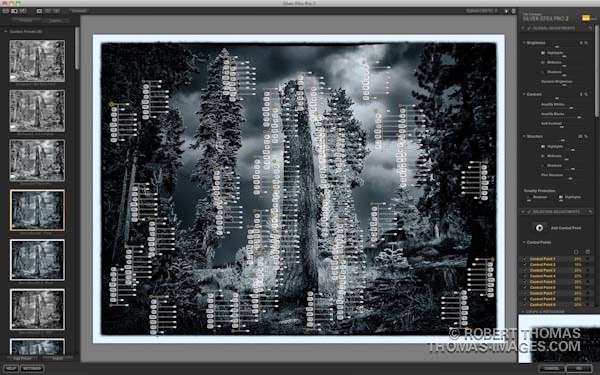
There were several areas in the image that I wanted to be darker, and others that I wanted lighter, so I added several Control Point throughout the image and adjusted them accordingly.
For example, I wanted the stump and the area around the base of the stump to remain relatively light, but I wanted some of the lighter areas near the lower and outer edges of the image to be darker—I wanted to draw the viewer’s eye towards the subject (the stump), and keep their focus on this area.
Control Points added (and selected for illustration purposes)
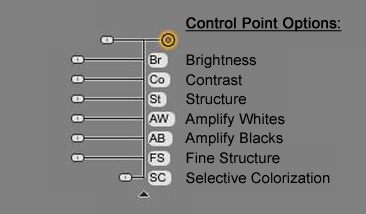
The Control Point options in Silver Efex Pro 2 also have the new “Amplify Whites” (labeled AW) and “Amplify Blacks” (labeled AB) options, so for the various Control Points that I set, I adjusted the Brightness, AW, and AB sliders to get the effect I wanted.
Description of Control Point options
One thought that I had for this image was to use the new “Selective Colorization” option to bring back some of the colors in the tree stump—again, to draw the viewers eye to the subject, and to give the image a subtle “twist.”
To use the “Selective Colorization” option on the stump, I placed several Control Points running from the top to the bottom of the stump. All of the Control Points were sized to match the width of the stump, and then grouped together by dragging the mouse over the stump’s Control Points to select them, and then clicking on the grouping icon to place them in a group (shown below).
Adding multiple Control Points to the tree stump
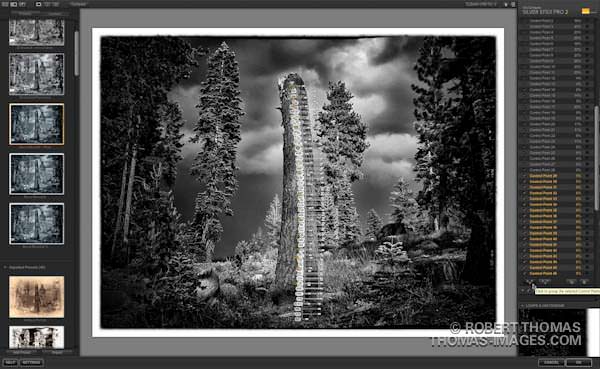
Selecting the Control Points on the tree stump:
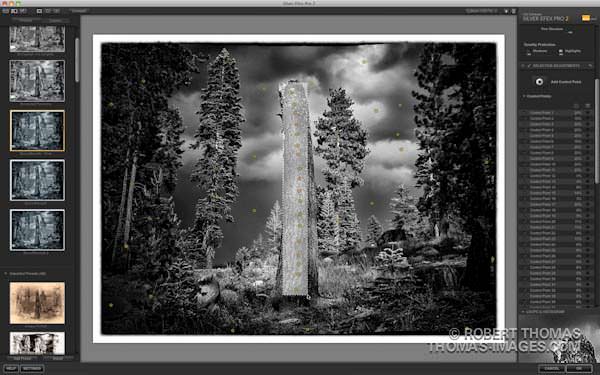
The “Group Control Points” icon
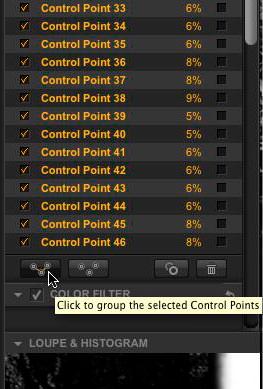
Once the Control Points were placed in a group, I adjusted the “Selective Color” slider (labeled SC) to bring back some of the original color of the stump. Note that it doesn’t hurt to add lots of Control Points, in fact the more Control Points the better. This is because the Control Points deliver information to the software’s algorithm to process—the more information it has to process, the more accurate the results!
The “Selective Colorization” slider on the Group Control Point
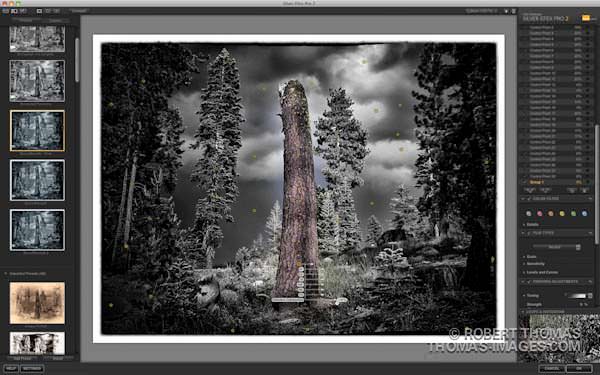
In the image above, you will notice that while the color of the tree stump was restored, so were some of the neighboring colors in the grass, sky, and trees. To counter this effect, I placed several small Control Points over the areas that I wanted to be black and white again, but this time, no adjustments were made to the Control Points—this tells the software “Hey…don’t apply that filter here!” A quick way to apply several small Control Points, is to create the first one, then use Option+Click & Drag (PC: Alt+Click & Drag) (to the new location). This will make a duplicate Control Point with the same settings at the original one. Remember, lots of little Control Points are better than just a few large ones, especially in this case!
Don’t get too carried away with the Control Points—there appears to be a limit of 64 Control Points per image. If you reach this limit, you’ll just have to move some of the Control Points around and make them larger.
The next step was to add some toning to the image. As a starting point I selected “Blue Toner 8” in the “Finishing Adjustments” section. To prevent the toning selection from affecting the whites in the image, I moved the “Paper Toning” slider all the way to the left (0%). I then adjusted the “Balance” slider until the balance of the toning looked good (The Balance slider controls which brightness levels receive the toning). For this image I moved the “Balance” slider to 34%. I then adjusted the “Strength” slider to control the intensity of the toning effect by setting it to 50%.
To add the finishing touches to this image, I added a vignette, burned the edges, and added an image border (also new in version 2). You may have noticed that most of the above screen shots already contained these “finishing touches.” While you would typically make these types of changes near the end of your work flow, in this tutorial I made them up front, because sometimes these finishing touches help you visualize the final image early in the work flow. The settings I used are illustrated below, but basically I used “Lens Falloff 3” for the Vignette, and “Type 8” for the Image Borders.
Selecting “Toner 8” in the Finishing Adjustments Panel

Adjustments made in the Finishing Adjustments Panel

Finishing the image
Because I was working with a Smart Object, once I saved the Silver Efex Pro 2 settings I could always revisit them by double-clicking on the appropriate layer in the Smart Object layer stack. However because I may want to reuse these settings on another photo, I elected to save them as a User Defined Custom Preset. To create your own Custom Presets, just click on the “Add Preset” icon in the lower left area of the screen, and give the new preset a name.
Once I saved my changes in Silver Efex Pro 2 and returned to Photoshop’s front-end, I noticed that the sky in the image was excessively noisy. This didn’t surprise me, given that the image was so noisy to begin with. To fix this, I did something I rarely do—I applied a second round of Dfine’s noise reduction.
Because the majority of the noise was in the sky, I decided to limit the noise reduction to just that area. To do this, I needed to paint the noise reduction in, and because you can’t paint the effect on a Smart Object, I had to flatten the Smart Object (rasterize the layer). After saving my Smart Object to a different file name (for backup purposes), I flattened the Smart Object by using the shortcut Cmd+Option+Shift+F (PC: Ctrl+Alt+Shift+F). I then applied a second round of Dfine’s noise reduction (using automatic & manual Control Point rectangles), and selected the option “Brush” from within the Dfine interface. Once back in the Photoshop front end, I proceeded to paint the noise reduction on the sky.
While this image could have been considered “officially finished,” I couldn’t help but push it to the limits by trying one more Nik Software effect on it—the Color Efex Pro 3.0 “Midnight” filter. After trying it, I found that this filter really did a great job of giving the image that “storminess” effect that I was looking for. The settings I used in the “Midnight” filter are illustrated below:
- Blur = 18%
- Contrast = 54%,
- Brightness = 100%
- Color = 100%
- Protect Shadows = 100%
- Protect Highlights = 0%
- Added Minus Control Points along the tree trunk
Color Efex Pro 3.0, Midnight filter settings

The final image
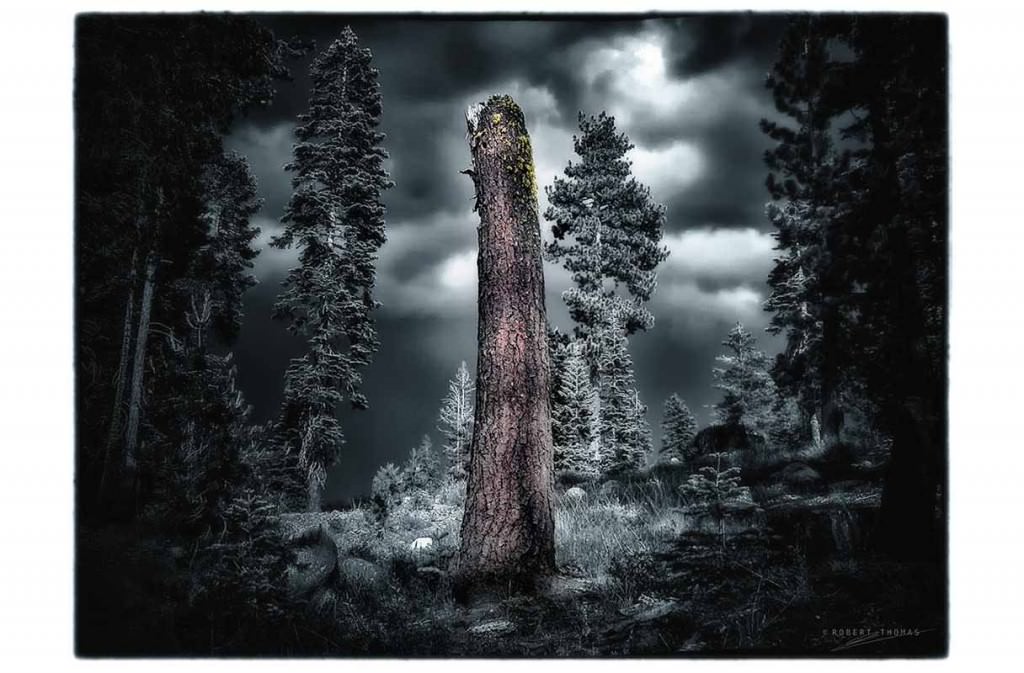
That wraps up this tutorial on black and white processing with Silver Efex Pro 2!
[poet-badge]
Brilliant.. thanks for your tutorial