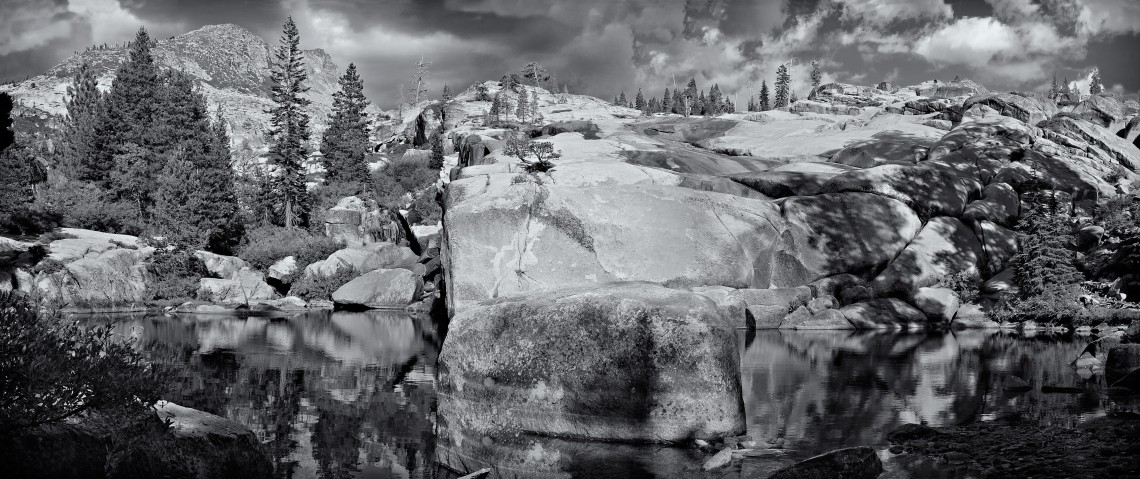
Here’s something fun you can do with dual monitors—take a panoramic image, and span it across both displays. You might have never noticed, but this technique is often seen on home and office walls in the form of spanned paintings or images. Sometimes the span extends across two, three, or more frames. Why not use this technique for the desktop background on your dual monitors?
The steps
Determine the resolution of your two monitors
On a Mac, you can go into System Preferences > Displays > Display (the tab). For this tutorial, I’m using two displays: the display on a 17″ MacBook Pro, and a 24″ external display. The resolution for both of my displays is set to 1920 x 1200 (width x height).
Given the 1920 x 1200 resolution settings, I would want to select an image that is twice the width of my display resolution, so I would need an image that is at least 3840px x 1200px. A panorama would be the most likely candidate for a wide image like this. For this exercise I choose a panorama that is 5209px x 2188px.
Crop the image
Begin by opening your image in Photoshop. Show the Rulers in Photoshop if they aren’t already displayed by using Cmd+R (PC: Ctrl+R).
If you would like to use a Ruler Guide (recommended), you can click and hold on the left Ruler Bar and drag a Guide to the right until it’s precisely over the 2604.5 px Ruler mark (5209 ÷ 2 = 2604.5).
To get an accurate Ruler Guide, use the Zoom tool to zoom in to the image until you see the appropriate ruler marks.
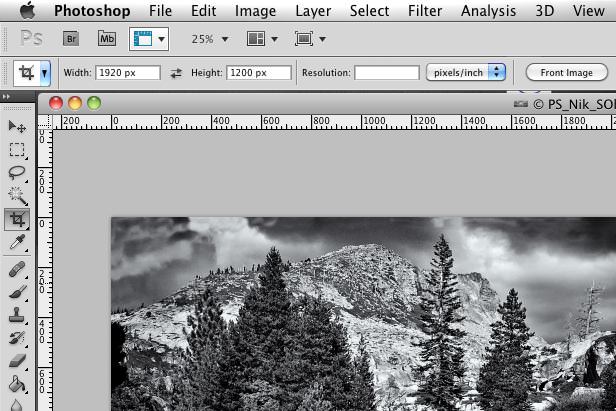
Select the crop tool (or tap the “C” key) and set the crop to 1920 px x 1200 px as shown in the image below (you can leave the Resolution field empty). Note that you will probably use different crop settings that are appropriate for the image you are working on.
Crop tool settings
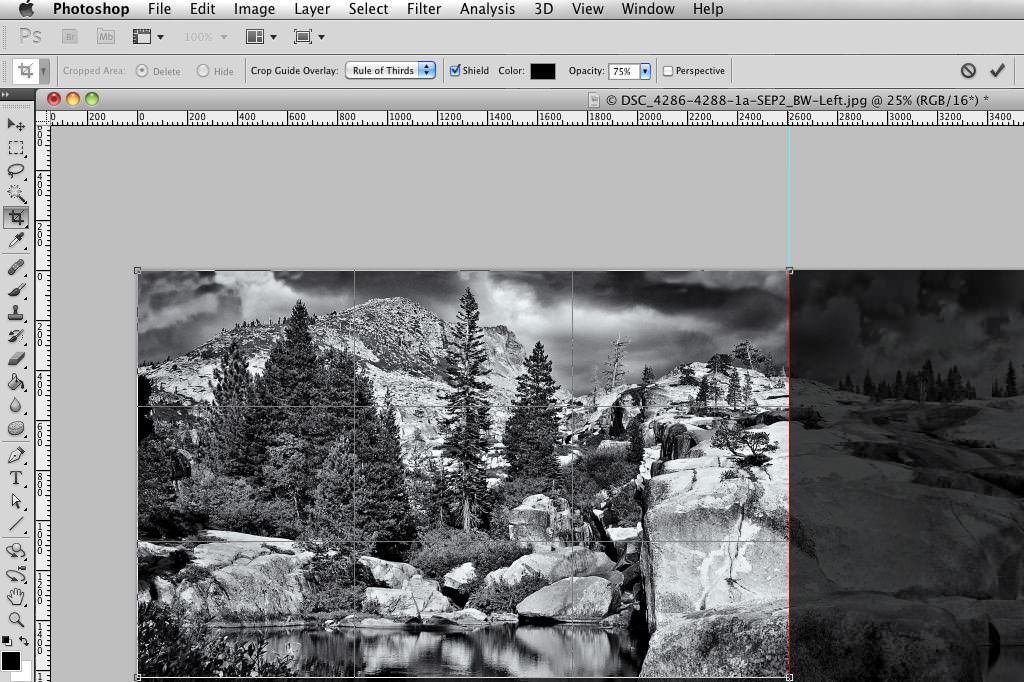
Using the Crop tool, click and hold in an area that is above and to the left of the image, and drag a crop area to the right until it reaches 2604.5 px (or until you see the red line appear on the Ruler Guide if you created one). Press the Return key to commit the crop.
Ruler guide

Use the keyboard combination Cmd+Option+Shift+S [PC: Ctrl+Alt+Shift+S] to “Save for Web and Devices…”
I recommend saving the file with a name like “yourFileName-Left.jpg.”
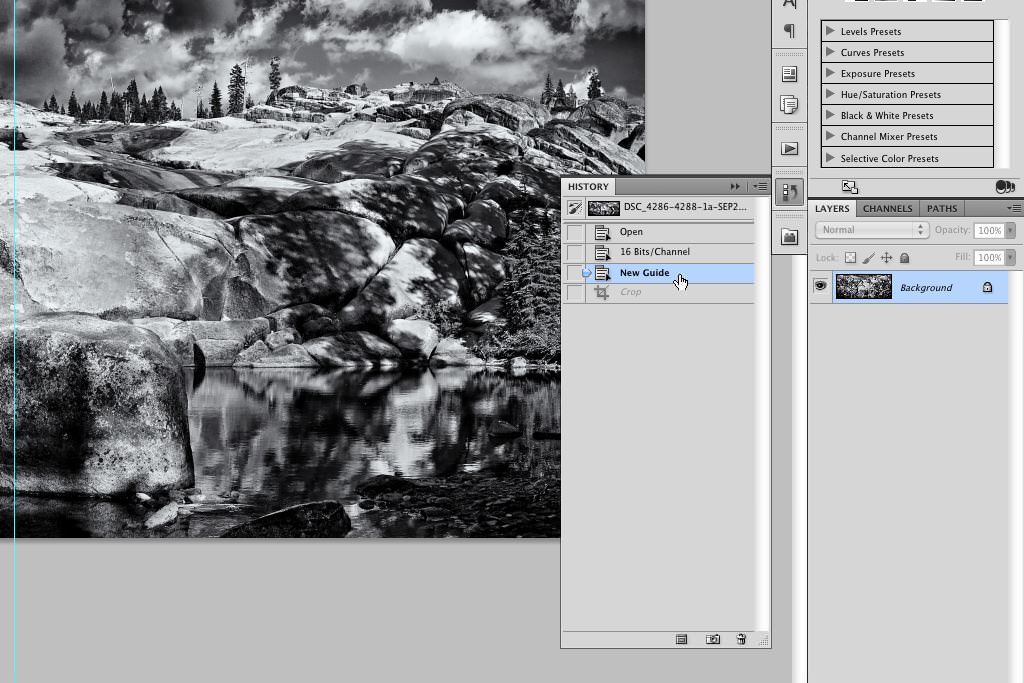
Once you save the file, use the Photoshop History Panel to revert back to the state prior to cropping as shown below—you would click on “New Guide” to return to that state.
If you don’t see the History Panel, use the keyboard command Option+F9.
History panel
Create another crop by clicking in the upper right corner of the image, and dragging to the left until the crop box is aligned with the 2064 px ruler mark (or the Ruler Guide). Press the Return key to commit the crop.
Use the keyboard combination Cmd+Option+Shift+S (PC: Ctrl+Alt+Shift+S) to “Save for Web and Devices…”
Save the file with a name like “yourFileName-Right.jpg.”
Now that we’ve created a new background image for each display, we just need to tell Mac OS X (or Windows) to use yourFileName-Right.jpg for the right display, and yourFileName-Left.jpg for the left display.
On Mac OS X, open System Preferences. Click on the “Desktop & Screen Saver” icon, and select the “Desktop” tab. From there just select the appropriate background images for the left and the right displays!
[poet-badge]


